The Brother LX2500 is a popular sewing machine, and readily available instruction manuals can be downloaded from the Internet Archive.
These PDF resources, uploaded in 2020 and 2022, offer comprehensive guidance for both English and Spanish speakers.
Overview of the LX2500 Model
The Brother LX2500 is presented as a user-friendly sewing machine, catering to both beginners and experienced sewists. Available instruction manuals, found on platforms like the Internet Archive, detail its functionality. These manuals, uploaded by chris85, showcase the LX2500’s versatility with a range of stitches.
The machine’s operation manual, accessible as a PDF, covers essential aspects like setup, threading, and basic sewing techniques. It also emphasizes the importance of using genuine Brother components, like drum units and toner cartridges, for optimal performance. Furthermore, the documentation highlights compatibility with Brother’s iPrint&Scan software, enabling mobile device control.
Key Features and Benefits
According to available manuals, the Brother LX2500 boasts a user-friendly design, making it accessible for various skill levels. A significant benefit is the readily available documentation – downloadable PDF guides from the Internet Archive simplify operation and maintenance.
The machine’s compatibility with Brother iPrint&Scan enhances convenience, allowing control via mobile devices. The manuals emphasize the importance of genuine Brother supplies for consistent quality. Access to detailed instructions, covering everything from threading to troubleshooting, empowers users to maximize the LX2500’s potential and address common issues like thread jamming effectively.
Getting Started with Your LX2500
Instruction manuals, available as PDF downloads, guide initial setup. They detail unboxing procedures and provide essential information for powering on and basic operation.
Unboxing and Initial Setup
Carefully unpack your Brother LX2500 sewing machine, ensuring all components are present. The instruction manual, readily available online as a PDF, details the contents of the box. Verify you have the machine itself, the power cord, the foot pedal, and various accessories like bobbins and presser feet.
Before initial use, remove all packing materials and protective coverings. Consult the manual for diagrams illustrating component placement. Proper setup is crucial for optimal performance. The manual also provides guidance on attaching the power cord and foot pedal correctly, preparing you for the next steps in operation.
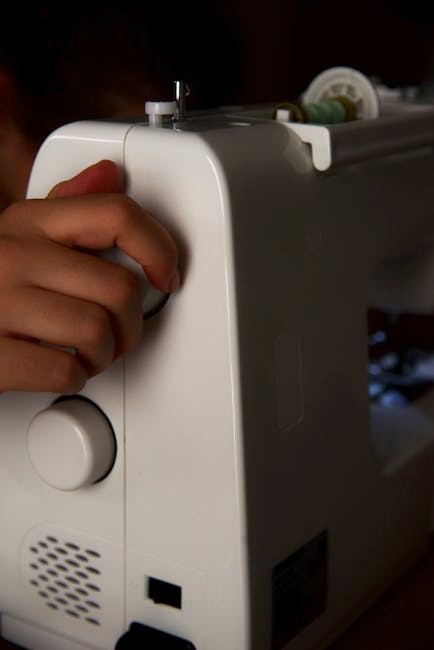
Powering On and Basic Controls
Refer to your Brother LX2500 instruction manual (available as a PDF download) for precise details on powering on the machine. Typically, this involves connecting the power cord and switching the power button, often located on the machine’s side. The manual illustrates the location of all controls.
Familiarize yourself with the basic controls: the power switch, the foot pedal, and the stitch selection dial. The manual explains the function of each. The foot pedal controls sewing speed; gentle pressure initiates slow stitching, while increased pressure increases speed. Understanding these fundamentals, as outlined in the manual, is key to successful operation.
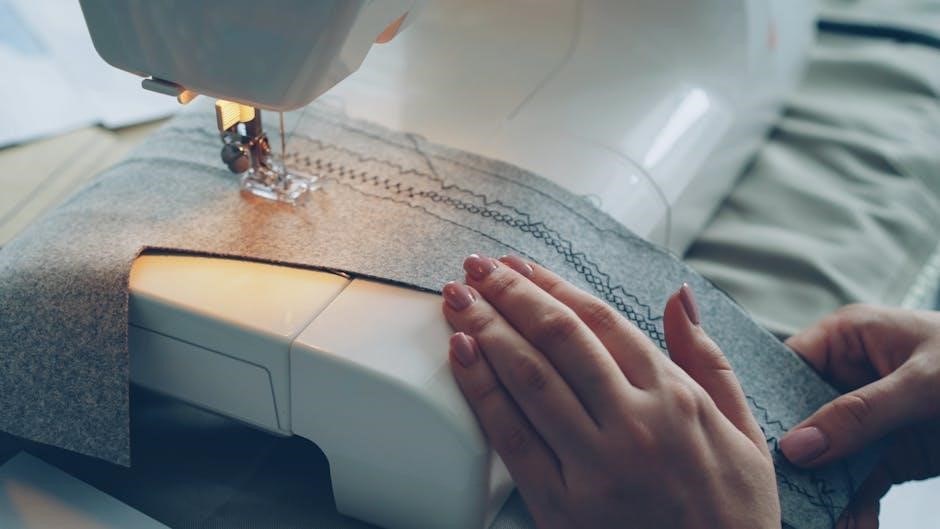
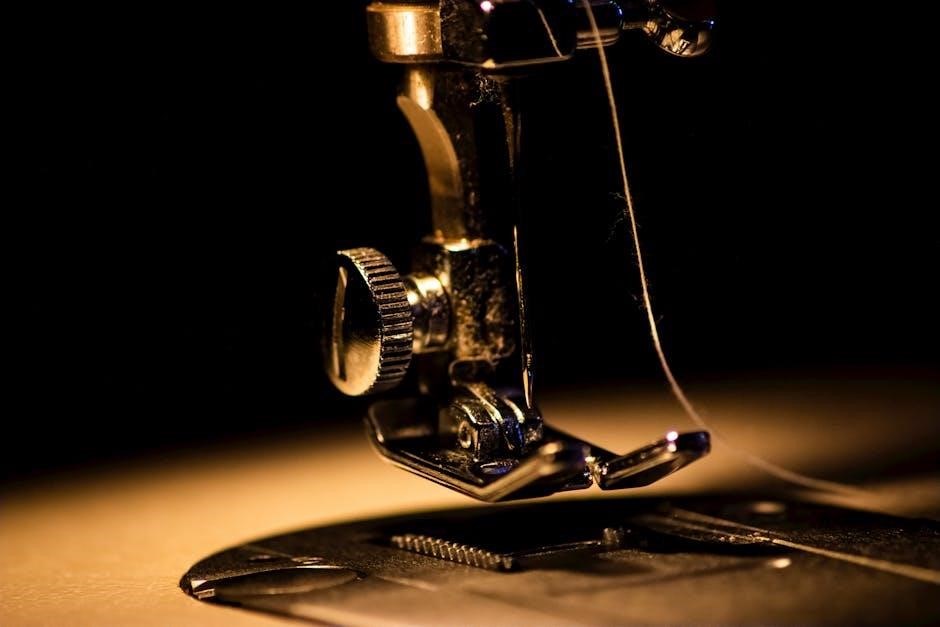
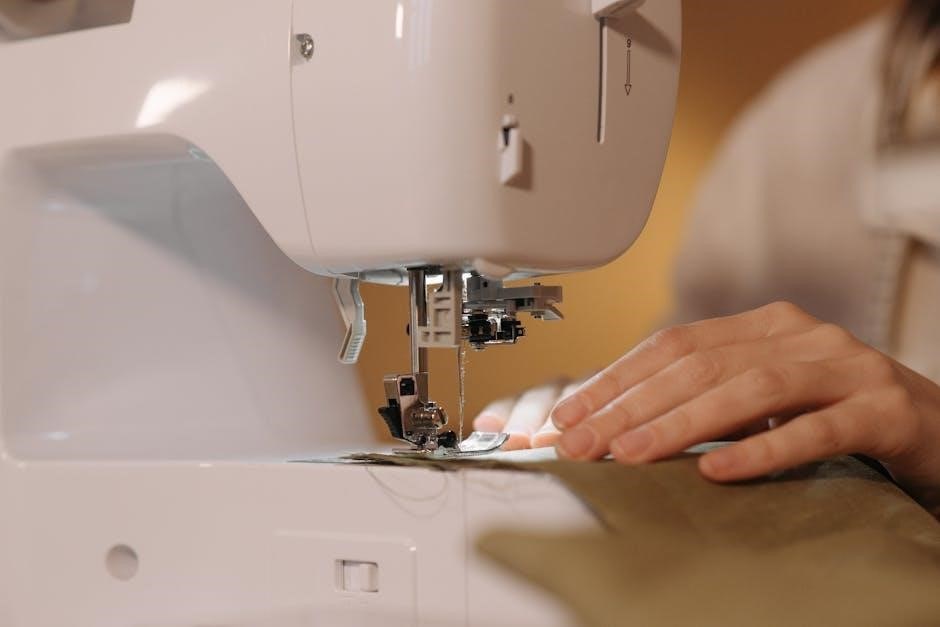
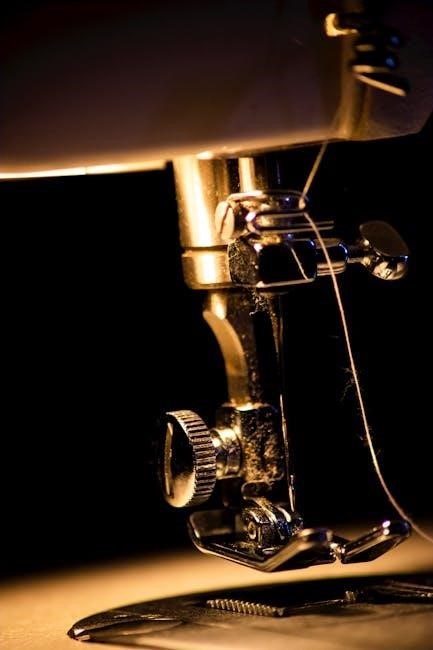
Threading the Machine
Consult your Brother LX2500 instruction manual – readily available as a PDF download – for detailed threading diagrams. Correct threading is crucial for proper stitch formation. The manual provides step-by-step illustrations for both upper and lower threading.
The manual clearly demonstrates the path for the upper thread, guiding it through various tension discs and the needle. It also details how to wind the bobbin correctly and insert it into the bobbin case. Following these instructions precisely, as shown in the manual, will prevent issues like thread breakage and skipped stitches.
Upper Threading Guide
The Brother LX2500 instruction manual provides a visual guide for upper threading. Begin by raising the presser foot; this opens the tension discs. Guide the thread from the spool, through the first tension disc, and then around the bobbin winder.
Next, follow the path indicated in the manual, leading the thread through additional tension discs and up to the take-up lever. Finally, thread the needle from front to back. The manual’s diagrams are essential for ensuring correct thread placement at each stage, preventing threading errors and ensuring smooth operation.
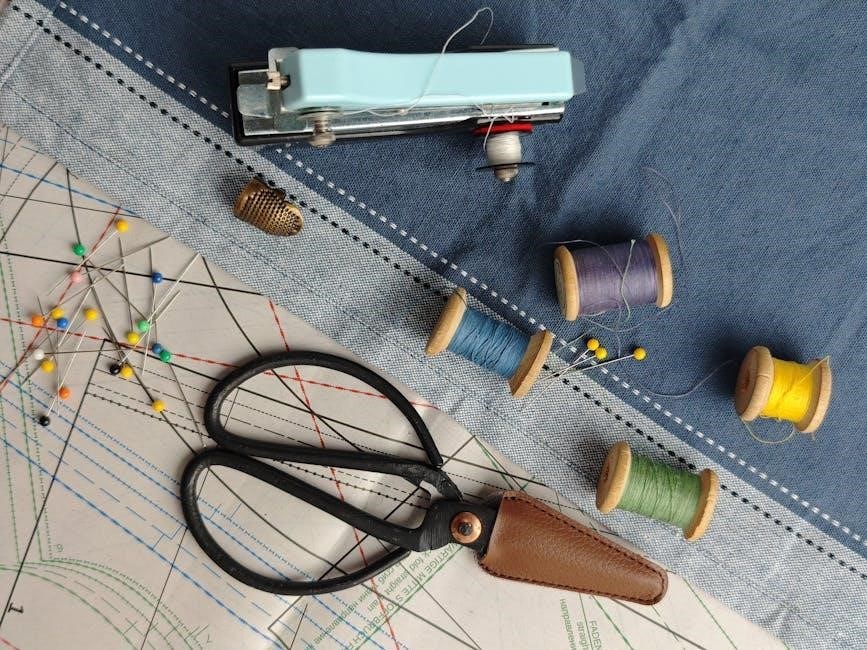
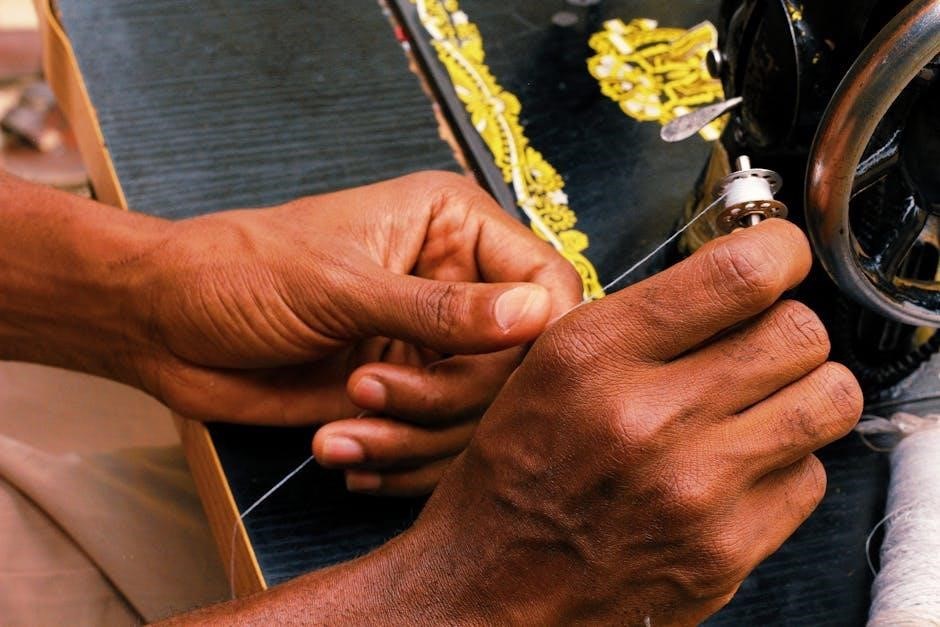
Bobbin Winding and Insertion
The Brother LX2500 instruction manual details bobbin winding. Place the spool on the spool pin and guide the thread to the bobbin winder. Engage the bobbin winder mechanism and start the machine. Allow the bobbin to fill evenly, then disengage and trim the thread.
For insertion, the manual instructs to locate the bobbin case. Insert the wound bobbin, ensuring the thread unwinds in the correct direction. Guide the thread through the tension spring and then through the designated slot. Proper bobbin insertion, as shown in the manual, is crucial for stitch quality.
Understanding the LX2500 Controls
The Brother LX2500 manual explains controls like the stitch selection dial, length/width adjustments, and reverse lever.
Mastering these features, detailed in the manual, unlocks the machine’s full potential.
Stitch Selection Dial
The Brother LX2500’s stitch selection dial is your primary method for choosing the desired stitch pattern. As detailed in the instruction manual, this dial features a range of options, including straight stitch, zigzag stitch, and various decorative stitches.
Rotating the dial aligns the chosen stitch with the needle, preparing the machine for that specific sewing application. The manual provides clear diagrams illustrating each stitch and its corresponding dial position. Understanding these positions is crucial for achieving the desired sewing results.
It’s important to consult the manual to identify the appropriate stitch for different fabrics and projects, ensuring optimal stitch quality and durability. Proper stitch selection is fundamental to successful sewing with the LX2500.
Stitch Length and Width Adjustment
The Brother LX2500 instruction manual details how to fine-tune your stitches using the length and width adjustment controls. These controls allow you to customize the appearance and strength of your seams.
Stitch length determines the distance between each stitch; a longer length is suitable for basting, while a shorter length provides greater security for permanent seams. Stitch width adjusts the breadth of zigzag or decorative stitches, influencing the fabric coverage and aesthetic appeal.
The manual emphasizes experimenting with these settings on scrap fabric to achieve the desired result. Precise adjustments are key to professional-looking projects, and the LX2500 offers ample control for various sewing needs.
Reverse Stitch Lever
The Brother LX2500 instruction manual explains the function of the reverse stitch lever, crucial for securing seams at the beginning and end. This lever, when engaged, causes the machine to stitch backward, reinforcing the stitch line and preventing unraveling.
The manual advises using the reverse stitch sparingly – typically a few stitches are sufficient. Prolonged reverse stitching can cause puckering or strain on the fabric. It’s located conveniently for easy access during sewing.
Understanding its proper use, as detailed in the LX2500 guide, ensures durable and professionally finished seams. Mastering this simple technique significantly enhances the quality of your sewing projects.
Foot Pedal Operation
The Brother LX2500 instruction manual details the foot pedal’s role in controlling sewing speed. Pressing the pedal regulates the machine’s stitching rate; gentle pressure yields slower speeds, while increased pressure results in faster sewing.
The manual emphasizes a smooth, consistent pressing motion for even stitches. It also notes that releasing the foot pedal immediately stops the needle, providing precise control.
Beginners are advised to practice controlling speed before starting a project. Proper foot pedal technique, as outlined in the LX2500 guide, is fundamental to achieving accurate and consistent sewing results.
Basic Sewing Techniques
The Brother LX2500 manual guides users through essential techniques like straight and zigzag stitching, and buttonhole creation for successful projects.
Straight Stitching
Mastering the straight stitch on your Brother LX2500 is fundamental. The instruction manual details selecting the appropriate straight stitch setting on the stitch dial.
Begin by threading the machine correctly, as outlined in the manual, and ensuring the correct needle is installed. Practice on scrap fabric first to adjust stitch length – a shorter length is ideal for delicate fabrics, while a longer length suits heavier materials.
Maintain a consistent sewing speed and guide the fabric gently; avoid pulling or pushing. The manual emphasizes keeping a consistent seam allowance for accurate results; Regularly check the stitch quality and adjust tension if needed, referencing the troubleshooting section for common issues.
Zigzag Stitching
The Brother LX2500’s zigzag stitch offers versatility for various applications; The instruction manual guides users to select the zigzag stitch on the stitch dial and adjust both width and length.
A narrower width is suitable for reinforcing edges, preventing fabric fraying, while a wider width creates decorative effects. Experiment with different stitch lengths on scrap fabric to understand their impact. The manual advises testing tension to achieve a balanced stitch, avoiding puckering or loose threads.
Zigzag stitching is also useful for sewing stretch fabrics, allowing the seam to expand with the material. Refer to the manual’s troubleshooting section for resolving uneven stitches.
Buttonhole Sewing
The Brother LX2500 simplifies buttonhole creation with its dedicated buttonhole foot and settings. The instruction manual details attaching the foot and selecting the appropriate buttonhole stitch on the dial.
It emphasizes measuring the button size accurately and adjusting the machine accordingly. The manual guides users through a four-step process: stitching the first side, pivoting, stitching the second side, and finally, securing the stitch.
Consistent tension is crucial for a clean buttonhole; the manual suggests test stitches. Troubleshooting tips address common issues like uneven buttonholes or thread breakage during the process.

Advanced Features and Techniques
The LX2500 manual details decorative stitching, presser foot pressure adjustments, and utilizing optional feet for specialized projects.
Decorative Stitching
The Brother LX2500 offers a range of decorative stitches to enhance your sewing projects, adding unique flair to garments and home décor. The instruction manual provides detailed diagrams and explanations for each stitch pattern.
Users can explore various options, including floral motifs, geometric designs, and shell patterns, to personalize their creations. The manual guides you through selecting the appropriate stitch, adjusting the stitch length and width, and testing the stitch on a scrap fabric before applying it to your final project.
Experimentation is encouraged, and the manual suggests combining different decorative stitches for even more creative effects. Proper tension adjustment is crucial for achieving optimal stitch quality, and the manual offers troubleshooting tips for common issues.
Adjusting Presser Foot Pressure
The Brother LX2500 instruction manual details how to adjust the presser foot pressure, a crucial element for achieving optimal sewing results with various fabrics. Incorrect pressure can lead to skipped stitches, puckering, or fabric slippage.
The manual explains that lighter fabrics require lower pressure, while heavier fabrics necessitate increased pressure. A dial or screw typically controls this adjustment. It’s recommended to test the setting on a scrap of the fabric you intend to use, observing the stitch quality.
Proper adjustment ensures even fabric feed and consistent stitch formation. The manual provides guidance on recognizing the signs of incorrect pressure and making the necessary corrections for professional-looking seams.
Using Optional Presser Feet
The Brother LX2500’s versatility expands with optional presser feet, detailed within the instruction manual. These feet cater to specialized sewing tasks beyond standard stitching. The manual illustrates how to correctly attach and detach these feet, ensuring a secure fit.
Examples include a zipper foot for close-to-edge stitching, a buttonhole foot for precise buttonholes, and a blind hem foot for invisible hems. The manual explains the specific applications for each foot, maximizing sewing efficiency.
Using the correct presser foot significantly improves stitch quality and simplifies complex projects. Referencing the manual’s diagrams ensures proper foot selection and usage.
Maintenance and Troubleshooting
The LX2500 manual details cleaning procedures, oil points for lubrication, and solutions for common issues like thread jamming and needle breakage.
Cleaning the Machine
Regular cleaning is crucial for maintaining the Brother LX2500’s performance and longevity. The instruction manual emphasizes removing lint and dust from various areas. Specifically, the bobbin area requires frequent attention to prevent build-up that can cause issues with stitch quality.
Always power off and unplug the machine before cleaning. Use a soft brush, often included with the machine, to gently remove debris. Avoid using compressed air, as it can push dust further into the mechanism. The manual also suggests cleaning around the feed dogs and the needle plate. Proper maintenance, as outlined in the guide, ensures smooth operation and prevents potential malfunctions.
Oil Points and Lubrication
The Brother LX2500 requires periodic lubrication to maintain smooth operation, as detailed in the instruction manual. However, modern machines often require minimal oiling. The manual will pinpoint specific oil points, typically around the bobbin area and the main shaft.
Use only sewing machine oil; other lubricants can damage the internal components. Apply oil sparingly – a drop or two is usually sufficient. Avoid over-oiling, which can attract dust and create a sticky residue. Regular cleaning, as previously mentioned, reduces the need for frequent lubrication. Consult the manual for the recommended oiling schedule and specific locations.
Common Problems and Solutions
The Brother LX2500 instruction manual addresses frequent issues. Thread jamming is common; re-threading the machine correctly, ensuring proper tension, and cleaning the bobbin area often resolves this. Needle breakage can occur with incorrect needle size for the fabric, bent needles, or forcing the fabric.
Always use the correct needle type and size. Check the needle is properly inserted. If problems persist, consult the manual’s troubleshooting section for detailed guidance. Remember to unplug the machine before attempting any repairs. The manual provides diagrams and step-by-step instructions for resolving these and other common issues.
Thread Jamming
The Brother LX2500 manual details solutions for thread jamming, a frequent issue. First, re-thread the entire machine, ensuring the presser foot is up, following the diagram precisely. Next, check the bobbin is correctly inserted and wound evenly. Incorrect tension is a primary cause; adjust both upper and bobbin tension dials.
Clean the bobbin case and feed dogs, removing lint and debris. Ensure the needle is appropriate for the fabric. If jamming persists, slowly turn the handwheel to locate the jam point and carefully remove tangled threads. Refer to the manual’s illustrations for guidance.
Needle Breakage
The Brother LX2500 manual addresses needle breakage, a common sewing problem. First, verify the correct needle type and size are used for the fabric weight. Using a too-thin needle on heavy fabric, or vice versa, causes breakage. Ensure the needle is fully inserted and correctly positioned.
Check the needle isn’t bent or damaged; replace it if necessary. Avoid pulling or pushing the fabric while sewing, let the machine feed it. Incorrect threading or tension can also stress the needle. Finally, ensure the needle plate isn’t obstructing the needle’s movement.
Safety Precautions
Always follow general safety guidelines when operating the Brother LX2500. Pay close attention to electrical safety, ensuring proper grounding and avoiding water exposure.
General Safety Guidelines
Before beginning any sewing project with your Brother LX2500, carefully read the entire instruction manual to understand all safety precautions. Always disconnect the machine from the power source when threading, changing the needle, cleaning, or performing any maintenance.
Never operate the sewing machine if it is damaged or malfunctioning. Keep fingers away from moving parts, such as the needle and foot, to prevent injury. Do not pull or push the fabric while sewing; let the machine feed the fabric naturally. Ensure the area around the machine is well-lit and free of clutter. Supervise children closely when they are near the sewing machine.
Use only genuine Brother accessories and attachments to maintain safety and performance. Avoid using excessive force when operating the machine. Regularly inspect the power cord for damage and replace it if necessary.
Electrical Safety
To ensure electrical safety when using your Brother LX2500, always verify the power supply matches the machine’s requirements. Never operate the machine with a damaged power cord or plug; replace them immediately. Avoid using extension cords if possible, and if necessary, use a heavy-duty cord rated for the machine’s amperage.
Do not expose the machine to moisture or operate it with wet hands. Always unplug the machine before cleaning or performing any maintenance. Never attempt to repair the machine yourself; contact a qualified technician for repairs. Ensure the machine is properly grounded to prevent electric shock. Keep the power cord away from heat sources and sharp edges.
Inspect the plug regularly for damage. Avoid overloading the electrical circuit.
Resources and Support
Brother’s support website offers downloadable instruction manuals for the LX2500. The Internet Archive also provides free access to PDF versions of the manual.
Downloading the Instruction Manual
Accessing the Brother LX2500 instruction manual is straightforward. Several online resources provide free downloads in PDF format. The Internet Archive hosts multiple versions, uploaded by chris85 in both 2020 and 2022, offering options for single-page viewing or complete file downloads.
Alternatively, visit the official Brother Support Website. Simply enter “LX2500” into the search bar to locate the manual directly. You can also find related resources and frequently asked questions. These digital copies ensure you always have convenient access to guidance for your sewing machine, eliminating the need for a physical copy.
Brother Support Website
Brother’s official support website is a valuable resource for LX2500 owners. To locate the instruction manual, utilize the “Search by Model Name” field and enter “LX2500”. This directs you to a dedicated support page containing downloadable manuals, FAQs, and troubleshooting guides.
Beyond the manual, the website offers access to iPrint&Scan software for PC/Mac, enhancing workflow functionality. You’ll also find information on genuine Brother parts and accessories. Should you encounter issues, the support site provides a pathway to connect with Brother’s customer service team for personalized assistance, ensuring a smooth sewing experience.
Frequently Asked Questions (FAQ)
Common questions regarding the Brother LX2500 often center around threading, bobbin insertion, and stitch selection. Users frequently inquire about resolving thread jamming or needle breakage, issues addressed in the downloadable instruction manual.
The FAQ section on Brother’s support website and within the manual itself provides solutions to these typical problems. Questions about iPrint&Scan compatibility and installation are also prevalent. Remember to always refer to the official documentation for accurate guidance, and utilize the search function to quickly find answers to specific concerns regarding your LX2500.