The Nikon D50, a digital SLR, offers a user-friendly experience with archived support and a downloadable PDF manual for comprehensive guidance.
What is the Nikon D50?
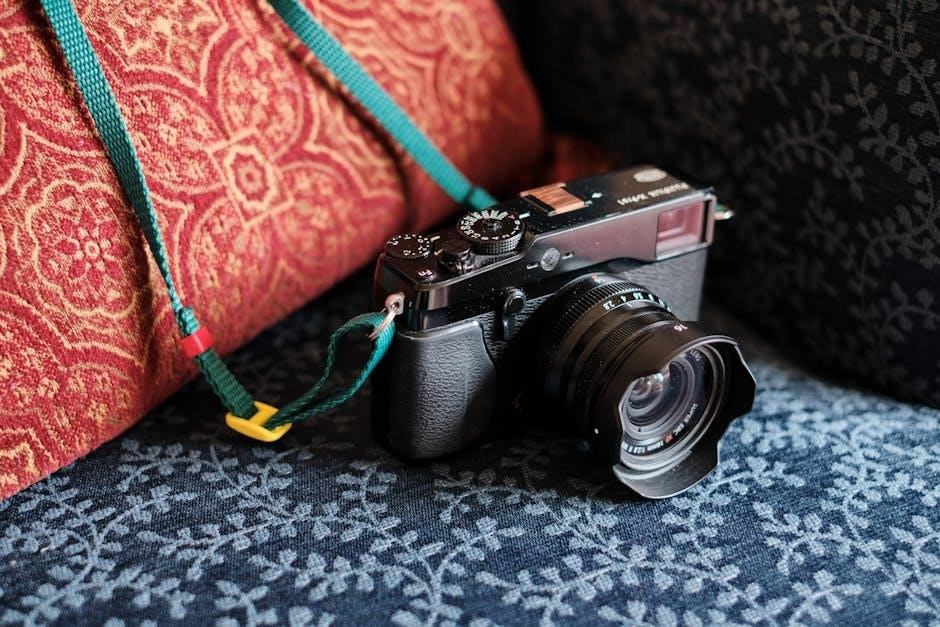
The Nikon D50 is a 6.2-megapixel digital single-lens reflex (DSLR) camera introduced in 2005, designed as an entry-level option for aspiring photographers. Despite being an archived product, it remains popular among enthusiasts due to its robust build and image quality. It’s a still camera, and service manuals are available in PDF format for those interested in repair.
Though older, the D50 provides a stepping stone into the world of DSLR photography, offering manual controls and interchangeable lenses. Resources like the official Nikon support channels and user manuals continue to assist owners. It’s a camera that, while superseded by newer models, still holds value for learning photographic principles.
Key Features and Specifications
The Nikon D50 boasts a 6.2-megapixel CCD image sensor, delivering detailed images. It features an 11-point autofocus system for accurate subject tracking and a continuous shooting speed of up to 3 frames per second. The camera accepts Nikon F-mount lenses, expanding creative possibilities.
Key specs include a 2.0-inch LCD screen for image review and a durable body. Service manuals, available as PDF downloads, detail its internal components. It supports CompactFlash (CF) memory cards for storage. While an older model, its specifications still provide a solid foundation for learning photography, and archived support remains accessible.

Getting Started with Your Nikon D50
Begin your journey with the Nikon D50 by familiarizing yourself with its controls and accessing the archived PDF manual for detailed setup instructions.
Unboxing and Initial Setup
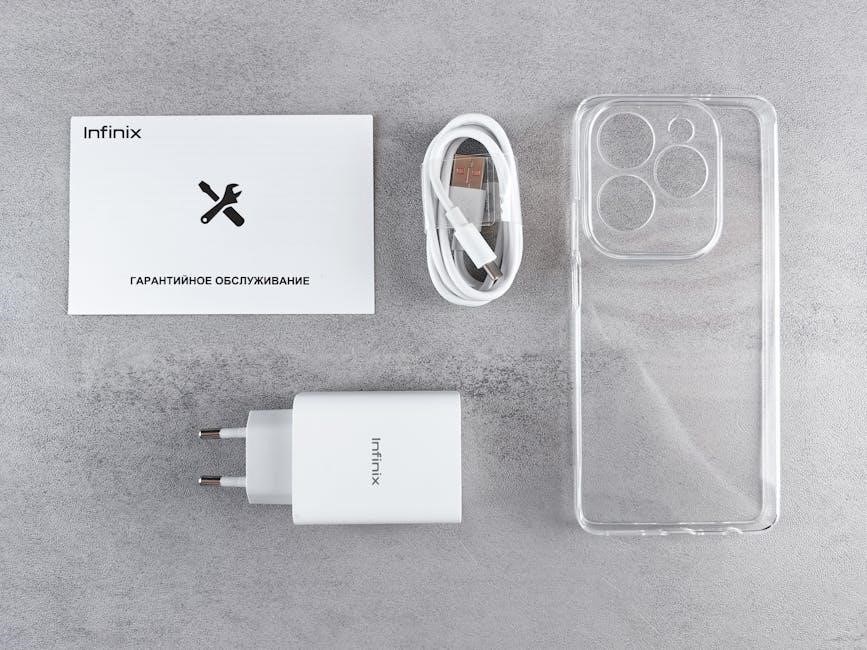
Upon unboxing your Nikon D50, carefully inspect all included components. These typically encompass the camera body, a kit lens, battery, charger, USB cable, and various manuals – including the crucial user guide available as a PDF. Before proceeding, ensure all items are present and undamaged.
Initial setup involves inserting the battery and a compatible memory card (not always included). Power on the camera and follow the on-screen prompts to set your preferred language, date, and time. Refer to the Nikon documentation, specifically the archived manual, for detailed step-by-step instructions. Proper initial setup ensures optimal performance and a smooth user experience.
Understanding the Camera Body and Controls
The Nikon D50 features a well-organized body layout. Key controls include the mode dial (Auto, Program, Aperture-priority, Shutter-priority, Manual), shutter button, and control dials for adjusting settings. The rear panel houses the LCD screen for image review and menu navigation. Familiarize yourself with the function buttons, offering quick access to frequently used features.
Consult the Nikon D50 manual (available as a PDF) for a detailed diagram and explanation of each control. Understanding the placement and function of these elements is crucial for efficient operation and unlocking the camera’s full potential. Practice navigating the controls to build muscle memory.
Inserting the Battery and Memory Card
To begin, locate the battery compartment on the Nikon D50’s bottom. Insert the EN-EL3 battery, ensuring correct polarity, until it clicks into place. The camera requires a charged battery for operation. Next, find the memory card slot, typically on the side. The D50 supports CompactFlash (CF) cards.
Insert the CF card, label-side up, until it locks. Refer to the Nikon D50 manual PDF for visual guidance. Proper insertion is vital for data storage. Always power off the camera before inserting or removing either the battery or memory card to prevent data corruption.

Basic Camera Settings
Configure essential settings like date, time, and language via the menu system on your Nikon D50, referencing the user manual for detailed steps.
Setting the Date, Time, and Language
Accurately setting the date and time on your Nikon D50 is crucial for correct file naming and organization of your photographs. Navigate to the setup menu using the camera’s buttons and select the ‘Date/Time’ option. Here, you can input the current date and time, ensuring they are precise.
The language setting allows you to customize the camera’s display and menu options to your preference. Within the setup menu, locate the ‘Language’ setting and choose from the available options. This ensures a comfortable and intuitive user experience. Refer to the Nikon D50 manual (available as a PDF) for visual guidance if needed, as menu layouts can sometimes vary.
Choosing the Image Quality and Size
Selecting the appropriate image quality and size on your Nikon D50 impacts both file size and image detail. Within the shooting menu, access the ‘Image Quality’ setting. Options typically include RAW, JPEG Fine, JPEG Normal, and JPEG Basic. RAW provides maximum editing flexibility, while JPEGs offer varying compression levels.
The ‘Image Size’ setting determines the resolution of your photos, influencing print size and cropping potential. Choose from Large, Medium, and Small. Larger sizes yield more detailed images but consume more memory card space. Consult the Nikon D50 manual’s PDF version for a detailed explanation of each setting and its implications for your photography.
Understanding Shooting Modes (Auto, Program, Aperture-Priority, Shutter-Priority, Manual)
The Nikon D50 offers several shooting modes to suit different skill levels and creative intentions. ‘Auto’ mode simplifies photography, letting the camera handle all settings. ‘Program’ mode allows some control while the camera manages aperture and shutter speed. ‘Aperture-Priority’ lets you set the aperture for depth of field control, while ‘Shutter-Priority’ controls motion blur.
Finally, ‘Manual’ mode grants complete control over both aperture and shutter speed. Refer to the Nikon D50 manual, available as a PDF, for detailed explanations of each mode and how to effectively utilize them to achieve your desired photographic results. Experiment to find what works best!

Focusing and Exposure
Mastering autofocus modes, focus points, and exposure compensation is crucial for sharp, well-lit images with your Nikon D50, as detailed in its manual.
Autofocus Modes and Focus Points
The Nikon D50 offers various autofocus (AF) modes to suit different shooting scenarios. Single-servo AF (AF-S) is ideal for stationary subjects, while continuous-servo AF (AF-C) tracks moving objects. Auto-servo AF (AF-A) automatically switches between these modes. Understanding these is key, as outlined in the Nikon D50 manual.
The camera features five focus points, allowing you to select the area where the camera prioritizes focus. You can choose a single focus point for precise control or let the camera automatically select one. Experimenting with different focus points and AF modes will significantly improve your image sharpness, especially when photographing dynamic scenes. Refer to the comprehensive guide for detailed explanations.
Exposure Compensation
Exposure compensation on the Nikon D50 allows you to override the camera’s automatically determined exposure. This is crucial when shooting scenes with unusual lighting, like very bright or very dark subjects. The Nikon D50 manual details how to adjust this setting using the +/- button.
Measured in stops (+/- 5 EV), exposure compensation brightens or darkens the image. Positive values (+1, +2, etc.) increase brightness, while negative values (-1, -2, etc.) decrease it. Mastering this feature ensures your photos accurately reflect the scene’s intended brightness, preventing over or underexposure. Practice using it in various conditions for optimal results.
Metering Modes (Matrix, Center-Weighted, Spot)
The Nikon D50 offers three distinct metering modes, influencing how the camera evaluates light for proper exposure. Matrix metering analyzes the entire scene, ideal for general photography. Center-weighted metering prioritizes the center of the frame, useful for portraits. The Nikon D50 manual explains each mode’s application.
Spot metering measures light from a very small area, perfect for challenging lighting situations where precise exposure is needed. Understanding these modes, and selecting the appropriate one, is vital for achieving well-exposed images. Experiment with each to see how they affect your photos in different scenarios.
Shooting in Different Modes
The Nikon D50 provides Auto, Program, Aperture-Priority, Shutter-Priority, and Manual modes, offering varying levels of creative control for diverse photographic scenarios.
Shooting in Auto Mode for Beginners
Auto mode on the Nikon D50 is perfect for those new to DSLR photography, simplifying the process by automatically selecting optimal settings for various scenes. The camera handles aperture, shutter speed, ISO, and white balance, allowing you to focus solely on composition and capturing the moment. While offering convenience, remember that Auto mode limits creative control.
For best results in Auto mode, ensure proper lighting and a steady hand. Review your images afterward to understand how different scenes are interpreted by the camera’s automatic settings. This will build your understanding and prepare you for exploring more advanced shooting modes as your confidence grows.
Using Program Mode for More Control
Program (P) mode on the Nikon D50 offers a step up from Auto, granting more control while still assisting with exposure settings. The camera automatically selects aperture and shutter speed, but allows you to adjust ISO, white balance, and exposure compensation. This mode is ideal for situations where you want a balance between convenience and creative input.
Experiment with exposure compensation to brighten or darken images without fully switching to manual control. Program mode is excellent for learning how aperture and shutter speed interact, preparing you for aperture-priority and shutter-priority modes. It’s a versatile option for everyday photography.
Mastering Aperture-Priority Mode for Depth of Field
Aperture-Priority (A) mode on the Nikon D50 empowers you to control the depth of field – the area in focus. You select the aperture (f-stop), and the camera automatically sets the shutter speed for proper exposure. A wider aperture (lower f-number, like f/2.8) creates a shallow depth of field, blurring the background for portraits.
Conversely, a narrower aperture (higher f-number, like f/16) yields a greater depth of field, keeping more of the scene sharp – perfect for landscapes. Understanding this relationship is key to artistic control. Experiment to see how different apertures affect your images and storytelling.
Utilizing Shutter-Priority Mode for Motion Control
Shutter-Priority (S) mode on your Nikon D50 lets you dictate the shutter speed, controlling how motion is captured. A fast shutter speed (e.g., 1/500s) freezes action, ideal for sports or wildlife. Conversely, a slow shutter speed (e.g., 1/30s) blurs motion, conveying a sense of movement – perfect for waterfalls or light trails.
The camera automatically adjusts the aperture to achieve correct exposure. Remember that slower shutter speeds require a tripod to avoid camera shake. Experiment with different speeds to master capturing or conveying motion effectively in your photographs.
Exploring Full Manual Mode for Complete Control
Manual (M) mode on the Nikon D50 grants ultimate creative control, allowing independent adjustment of both aperture and shutter speed. This mode demands understanding the exposure triangle – the relationship between aperture, shutter speed, and ISO. Use the light meter as a guide to achieve proper exposure, balancing these settings.
Manual mode is ideal for challenging lighting situations or when you desire a specific artistic effect. It requires practice, but unlocks the full potential of your camera, offering unparalleled customization and photographic expression.

Understanding the Menu System
The Nikon D50 menu allows customization of settings, navigating through options to tailor the camera to your preferences for optimal performance.
Navigating the Nikon D50 Menu
The Nikon D50’s menu system is accessed via the ‘Menu’ button on the camera’s back panel. It’s logically organized into several tabs, each represented by a colored icon. These include the playback menu for reviewing images, the recording menu for shooting settings, the setup menu for camera adjustments, and a custom settings bank.
Use the multi-selector (directional pad) to highlight menu options and press the ‘OK’ button to select. The right arrow navigates to the next menu screen, while the left arrow returns to the previous one. Understanding this structure is key to efficiently customizing your camera and accessing its full range of features, as detailed in the PDF manual.
Customizing Menu Settings
Within the Nikon D50’s menu, personalization is key. The ‘Setup’ menu allows adjustments like beep sounds, display settings (brightness, LCD information), and date/time formats. The ‘Recording’ menu lets you tailor image quality, autofocus modes, and metering options. Explore ‘Custom Settings’ to save preferred combinations for quick recall – a valuable feature for different shooting scenarios.
Remember to consult the PDF manual for detailed explanations of each setting. Experimenting with these options allows you to optimize the camera for your specific needs and photographic style, enhancing your overall shooting experience and achieving desired results.
Advanced Features
Nikon D50 advanced features include white balance, picture control settings, and effective flash utilization, all detailed within the comprehensive user PDF manual.
White Balance Settings
The Nikon D50 offers several white balance settings crucial for accurate color reproduction in various lighting conditions. Auto White Balance generally performs well, but for precise results, explore presets like Daylight, Cloudy, Fluorescent, and Incandescent. Custom White Balance allows you to manually set the white point using a gray card or white object, ensuring colors appear natural. Understanding these settings, detailed in the Nikon D50 manual, is key to achieving desired image tones. Incorrect white balance can lead to color casts, impacting the overall aesthetic. Experimenting with these options will enhance your photographic control and deliver consistently accurate colors, as outlined in available support resources and the PDF documentation.
Picture Control Settings
The Nikon D50’s Picture Control settings allow you to customize the look of your images directly in-camera. Options include Standard, Vivid, Neutral, Portrait, and Landscape, each affecting color, contrast, and sharpness. You can further fine-tune these presets or create custom Picture Controls to match your personal style. These settings are non-destructive, meaning the original image data remains untouched. Refer to the Nikon D50 manual (available as a PDF) for detailed explanations of each setting’s impact. Mastering Picture Controls offers creative control, reducing post-processing needs and delivering your desired aesthetic straight from the camera.
Using Flash Effectively
The Nikon D50 features a built-in flash and a hot shoe for external flash units. Understanding flash modes – Auto, Red-Eye Reduction, Fill-Flash, and Manual – is crucial; Auto flash lets the camera decide when to fire, while fill-flash brightens shadows in daylight. Red-Eye Reduction minimizes the red-eye effect in portraits. For more control, explore external flash options and the Nikon D50 manual’s guidance on flash compensation. Proper flash usage enhances image quality in low-light situations and adds creative possibilities. Consult the PDF manual for detailed settings and techniques.

Troubleshooting Common Issues
Addressing blurry images, exposure problems, and autofocus issues is covered in the Nikon D50 manual, offering solutions for common photographic challenges.
Dealing with Blurry Images
Blurry photos with your Nikon D50 often stem from several easily correctable issues. First, ensure sufficient light; low light necessitates slower shutter speeds, increasing blur risk. Verify your autofocus is correctly engaged and focused on your intended subject – experiment with different autofocus modes and focus points.
Camera shake is a frequent culprit; utilize a tripod for stability, especially in low light. Confirm your lens is clean, as smudges can soften images. Finally, review your shooting technique – a steady grip and smooth shutter release are crucial. Consult the Nikon D50 manual’s troubleshooting section for detailed guidance and further solutions.
Fixing Exposure Problems
Incorrect exposure – images too dark or bright – is a common issue with the Nikon D50. Begin by understanding metering modes: Matrix, Center-Weighted, and Spot, selecting the appropriate one for your scene. Utilize exposure compensation to fine-tune brightness; positive values brighten, negative values darken.
Review your chosen shooting mode. Auto mode can sometimes misjudge, while Program, Aperture-Priority, or Shutter-Priority offer greater control. Check your ISO setting; higher ISOs increase brightness but can introduce noise. Refer to the Nikon D50 manual for detailed explanations of these settings and troubleshooting tips.
Addressing Autofocus Issues
If your Nikon D50 struggles to achieve sharp focus, first ensure you’ve selected the correct autofocus mode – Single Servo (AF-S) for stationary subjects, Continuous Servo (AF-C) for moving ones. Verify the active focus point aligns with your intended subject. Insufficient light can hinder autofocus performance; consider using the built-in flash or an external light source.
Experiment with different focus points to find one that locks onto your subject effectively. Consult the Nikon D50 manual for detailed explanations of autofocus settings and troubleshooting steps if issues persist. Clean the lens to remove any obstructions.

Maintaining Your Nikon D50
Regularly clean the sensor and properly care for the battery to ensure optimal performance and longevity of your Nikon D50 camera.
Cleaning the Sensor
Dust accumulation on the Nikon D50’s sensor is inevitable, potentially causing spots in your images. Regularly inspect the sensor using the camera’s sensor cleaning function, accessible through the setup menu. If the built-in cleaning doesn’t suffice, consider a manual cleaning process.
Use a dedicated sensor cleaning kit, including a blower to remove loose particles. Avoid touching the sensor directly! Gently sweep across the surface with a sensor brush or utilize wet cleaning swabs with sensor cleaning fluid, following kit instructions carefully. Improper cleaning can damage the sensor, so proceed cautiously or seek professional assistance if unsure.
Caring for the Battery
To maximize the lifespan of your Nikon D50’s battery, follow these guidelines. Avoid completely discharging the battery, as this can reduce its capacity over time. Instead, charge it when it’s partially depleted. Store the battery in a cool, dry place, away from extreme temperatures.
Remove the battery if the camera will be unused for an extended period. Do not short-circuit the battery terminals. Use only the Nikon-approved charger to prevent damage. Regularly check the battery contacts for corrosion and clean them gently if necessary, ensuring optimal charging and performance.

Resources and Support
Access the Nikon D50 manual in PDF format online, and find official Nikon support channels for warranty details and service inquiries.
Downloading the Nikon D50 Manual (PDF)
Obtaining the Nikon D50 manual in PDF format is straightforward, providing a readily accessible resource for understanding your camera’s features and functions. Several online platforms host this valuable document, allowing users to download it directly to their computers or mobile devices.
This digital manual encompasses all aspects of the Nikon D50, from basic operations to advanced settings, ensuring you have the information needed to maximize your photographic experience. It’s a crucial tool for both beginners and experienced photographers alike, offering detailed explanations and troubleshooting guidance. Accessing the PDF version eliminates the need for a physical copy, making it convenient for on-the-go reference.
Finding Nikon Support and Service
For dedicated assistance with your Nikon D50, accessing official Nikon support channels is paramount. While the D50 is an archived product, Nikon continues to offer resources for existing users. Begin by exploring the Nikon website for frequently asked questions, troubleshooting guides, and downloadable software updates.
If you require repair services or have warranty inquiries, the Nikon website provides information on authorized service centers and warranty policies. Remember to consult official Nikon documentation for detailed warranty specifics. Direct contact with Nikon support ensures you receive accurate and reliable assistance tailored to your Nikon D50.